Friday, November 29, 2013

Grandma's Log Cabin Hat

In between all the busyness of the holidays and trying to open a medical clinic at the Crisis Pregnancy Center I work at, I found time to sneak this in and it reminds me of growing up in the big log cabin.

Materials:
Paton's Classic Wool worsted weight in Natural Mix
Size 7 circular needles

Pattern:
 Cast on 90 stitches, join and place marker. Work 7 rows in Knit 3, Purl 3 rib.

Lace Pattern:
Row 1: *K 1, YO, K2tog, SSK, YO;* Repeat
Row 2: Knit
Row 3: *K 1, YO, K2tog, SSK, YO;* Repeat
Row 4: Knit
Row 5: *K 1, YO, K2tog, SSK, YO;* Repeat
Row 5: Knit
Row 7: *K 1, YO, K2tog, K5, SSK, YO;* Repeat
Row 8: Knit
Row 9: *K 2, YO, K2tog, K3, SSK, K1;* Repeat
Row 10: Knit
Row 11: *K 3, YO K2tog, K, SSK, K2;* Repeat
Row 12: Knit
Row 13: *K 4, YO, K3tog, YO, K3;* Repeat
Row 14: Knit

Repeat Rows 1-14 three times.

Begin decrease as follows:
Row 1: *K2, K2tog, YO, K3tog, YO, SSK, K*; repeat
Row 2: Knit
Row 3: *K, K2tog, YO, K3tog, YO, SSK*; repeat
Row 4: Knit
Row 5: *K3tog, YO, K3tog, YO*; repeat
Row 6:  K2tog, K2; repeat.
Row 7: K2tog, K; repeat
Row 8: K2tog. Sew through remaining stitches and secure.

Friday, November 22, 2013

Best Pumpkin Bread

Since the Holidays are here I thought I would share another good recipe, this one is from a friend and makes a very moist and delicious bread which will be a big hit.  This does not have nuts or raisins in it but either are a great addition.

5 eggs
1 1/4 cups oil
1 14 ounce can of pumpkin
2 cups flour
2 cups sugar
2 (3 oz.) packages of vanilla cook and serve pudding
1 tsp soda
1 tsp cinnamon
1 tsp salt

Beat after every addition above until mixed thoroughly.  Do not over beat.
Grease 2 loaf pans (or use spray Pam)
Pour 1/2 into each loaf pan

Bake in a preheated oven at 325 degrees for 80 minutes or more.  The bread will look dark but do not remove from the oven until the top is NOT gooey and appears set.  Let it cool and enjoy!!   This bread freezes well if you want to save one loaf for later.

Tuesday, November 5, 2013

Simply Striped Ribbed Hat

Mom has clearly been beating me in the category of finishing projects - might have something to do with how crazy my October surprisingly became.

But... in the middle of the craziness I pulled this together for my husband's dental assistant. It is a toddler size (fitting perfectly on our spunky 3 year old).

Supplies:
I used scrap yarn - any two colors in worsted weight and about 1/3 skein for each color.

Size 7 Circular Needles
Pom-Pom Maker

Pattern:
Band: In main color cast on 80 stitches, place marker, and join. Work in Knit 2, Purl 2 Rib for 10 rows.
Stripe 1: Switch to alternating color and knit 4 rows in Purl 3, Knit 1 rib.
Stripe 2: Return to main color and knit 2 rows continuing in Purl 3, Knit 1 rib.

Alternate Stripe 1 and 2 until you have 9 Stripes (ending in a alternating color stripe 1).

Decrease:

Row 1: In main color, Purl 3, Knit 1, Purl 2, K2tog. Repeat 9 more times.
Row 2: In main color, Purl 3, Knit 1, Purl 1, K2tog. Repeat 9 more times.
Row 3 In alternating color, Purl 3, Knit 1, K2tog. Repeat 9 more times.
Row 4: In alternating color, Purl 3, K2tog. Repeat 9 more times.
Row 5: In alternating color, Purl 2, K2tog. Repeat 9 more times.
Row 6: In alternating color, Purl 1, K2tog. Repeat 9 more times.
Row 7: In alternating color K2tog 10 times. Break wool and use tail to sew stitches together and finish the hat.

Using the main color create a pom-pom (Ours is 1") to top the hat.

Sunday, November 3, 2013

Mountain Man Beard Hat

I have made a couple of beard hats, one a viking type hat, the other an elf, but wanted to do something a little more woodsy since we just got back from a mission trip to Alaska.  This one is of a little thicker yarn so it makes up pretty quick and will be a little warmer.  The beard is made in HDC then you go back over the base HDC posts on each stitch and make chain loops to give it a burly look.

For this I used Serenity Chunky Weight Yarn in Dark Forest for the hat
size K or 6.5mm hook

To start the hat make a magic loop or chain 4 and make a loop, then ch 1.

Round 1:  10 HDC in the loop, sl st to the top of the first st, ch 1. (10 HDC)
Round 2:  make 2 HDC in each st around, sl st to the top of the first st, ch 1.(20 HDC)
Round 3:  2 HDC in the first st, 1 HDC in the next, repeat around, sl st to the top of the first st, ch 1.  (30 HDC)
Round 4:  2 HDC in the first st, 1 HDC in the next 4 sts, repeat around, sl st to the top of the first st, ch 1.  (36 HDC)
Round 5:  2 HDC in the first st, 1 HDC in the next 5 sts, repeat around, sl st to the top of the first st, ch 1.  (42 HDC)
Round 6:  2 HDC in the first st, 1 HDC in the next 6 sts, repeat around, sl st to the top of the first st, ch 1.
(48 HDC)
Round 7:  2 HDC in the first st, 1 HDC in the next 7 sts, repeat around, sl st to the top of the first st, ch 1.
(56 HDC)
Rounds 8-16:  1 HDC in each st around, sl st to the top of the first st, ch 1.  (56 HDC)
Rounds 17-19: 1 SC in the first st, 1 DC in the post of the next st, repeat around, sl st to the top of the first st, ch 1.
at the end of row 19 tie off and weave in the end.

For the beard I used Lion Brand Vanna's Choice Yarn in Chocolate, and a size I hook.  You will need to know how to do HDCD (half double crochet decrease) stitches for this.  The beard will curve nicely around the chin to keep it nice and warm.
To start chain 31.
Row 1:  1 HDC in the second ch from the hook and then 1 HDC in each stitch across, ch 1 and turn. (30 HDC)
Row 2:   1 HDC in each st across, ch 1 and turn.  (30 HDC)
Row 3:  1 HDC in the first 9 sts, 2 HDC in the next st, 1 HDC in the next 9 sts, 2 HDC in the next st, 1 HDC in the last 10 sts, ch 1 turn.  (32 HDC)
Row 4:  1 HDC in each st across.  (32 HDC)
Row 5:  HDCD in the first 2 sts, 1 HDC in the next 8 sts, HDCD in the next two sts, 1 HDC in the next 8 sts, HDCD in the next 2 sts, 1 HDC in the next 8 sts, HDCD in the last two sts, ch 2 and turn. (28 HDC)
Row 6:  1 HDC in each st across.
Row 7:  HDCD in the first 2 sts, HDC in the next 7 sts, HDCD in the next 2 sts, HDC in the next 6 sts, HDCD in the next 2 sts, HDC in the next 7 sts, HDCD in the last 2 sts. ch 1

Now is the fun part, giving the beard some loops.  I used ch 6 loops, but if you want a longer beard you can chain 8 or more to get the length you like.  You will be working backwards back up the beard.  To start you sl st to the end HDC post of row 7 and then ch 6, sl st to the next post, repeat across for your first row of chain loops, then ch 1 and begin on the next row above.  After you have your 7 rows of chain loops you can add a mustache if you would like.  I folded the beard in half to make it even and counted down 8 stitches from each end, attach your yarn and chain 8 and sl st to the other side 8 stitches from the edge.  Chain 1 and sl st just above the ch into the main part of the beard and then sc across the chain, (8 SC) sl st just above the chain in the beard, then ch 4 and sl st to the next st, repeat this across the mustache making smaller chain loops, and when you get across to the other side turn and make 8 more ch loops across the bottom of the mustache.  Weave in your loose ends and attach the beard to the hat.

Friday, October 11, 2013

Make a Monster hat.


This hat is made with Vanna's Choice Yarns in the following colors:
Radiant Lime
Sapphire
White
Black

Toddler Size:
You will also need an I or 5.5 mm hook and a yarn needle.

To start make a magic loop or a chain 4 loop and ch 1.
Round 1:  10 HDC in the loop, sl st to the top of the first st and ch 1.
Round 2:  make 2 HDC in each st around. (20 HDC) sl st to the top of the first st and ch 1.
Round 3:  make 2 HDC in the first st, 1 HDC in the next st, repeat around (30 HDC) sl st to the top of the first st and ch 1.
Round 4:  make 2 HDC in the first st, 1 HDC in the next 4 sts, repeat around (36 HDC) sl st to the top of the first st and ch 1.
Round 5:  make 2 HDC in the first st, 1 HDC in the next 5 sts, repeat around (42 HDC) sl st to the top of the first st and ch 1.
Round 6:  make 2 HDC in the first st, 1 HDC in the next 6 sts, repeat around (48 HDC) sl st to the top of the first st and ch 1.
Round 7:  make 2 HDC in the first st, 1 HDC in the next 7 sts, repeat around (54 HDC) sl st to the top of the first st and ch 1.
Rounds 8-16:  1 HDC in each st around, (54 HDC) sl st to the top of the first st and ch 1.

Ear flaps:
Row 1:  1 HDC in the next 12 sts, ch 1 and turn.
Row 2:  sk the first st, 1 HDC in the next 9 sts, HDCD in the last 2 sts, ch 1 turn.
Row 3:  sk the first st, 1 HDC in the next 7 sts, HDCD in the last 2 sts, ch 1 turn.
Row 4:  sk the first st, 1 HDC in the next 5 sts, HDCD in the last 2 sts, ch 1 turn.
Row 5:  sk the first st, 1 HDC in the next 3 sts, HDCD in the last 2 sts, ch 1 turn.
Row 6:  sk the first st, 1 HDC in the next st, HDC in the last 2 sts, ch 1.
Row 7:  HDCD in the two remaining sts, tie off.

Count 20 sts across the front of the hat, attach your yarn on the 21st st and ch 1, to begin the second ear flap, repeat the instructions above.

to finish the bottom of the hat starting at the tip of the ear flap with Sapphire SC evenly around the bottom of the hat.  Weave in all ends.

Monster eye:
with black make a magic loop, and ch 2.
round 1:  make 10 SC in the loop and pull the loop tight, sl st to the top of the first st tie off.
round 2:  switch to Sapphire ch 1, and do 2 HDC in each stitch sl st to the top of the first st, tie off and switch to white.
round 3:  ch 2, do 2 DC in the first st, 1 DC in the next st, repeat around, sl st to the top of the first st, tie off leaving a long tail to sew on the eye around the bottom.
Now switch to Radiant lime and start just above the tail from round 3.
Row 1:  ch 1, then do 1 SC in the next 16 sts, turn and work back sk the first st, then do 1 HDC in the next 14 sts, sl st in the last st and tie off leaving a long tail to sew on the top half of the eye.

Horns: Make 2 in Radiant Lime.
make a magic loop and ch 1,
do 6 HDC in the loop and pull it tight, sl st to the top of the first st and ch 1.
Round 2:  2 HDC in each stitch around, sl st to the top of the first st, and ch 1.
Round 3:  2 HDC in the first st, 1 HDC in the next st, repeat around, sl st to the top of the first st, tie off leaving a tail to sew on the horn.

Mouth:  Using a yarn needle with double thread embroider on a mouth using a backstitch.

Braids are each made with twelve strands, 4 of each color and strands are 30 inches long.

Preschool size:
To start make a magic loop or a chain 4 loop and ch 1.
Round 1:  10 HDC in the loop, sl st to the top of the first st and ch 1.
Round 2:  make 2 HDC in each st around. (20 HDC) sl st to the top of the first st and ch 1.
Round 3:  make 2 HDC in the first st, 1 HDC in the next st, repeat around (30 HDC) sl st to the top of the first st and ch 1.
Round 4:  make 2 HDC in the first st, 1 HDC in the next 4 sts, repeat around (36 HDC) sl st to the top of the first st and ch 1.
Round 5:  make 2 HDC in the first st, 1 HDC in the next 5 sts, repeat around (42 HDC) sl st to the top of the first st and ch 1.
Round 6:  make 2 HDC in the first st, 1 HDC in the next 6 sts, repeat around (48 HDC) sl st to the top of the first st and ch 1.
Round 7:  make 2 HDC in the first st, 1 HDC in the next 7 sts, repeat around (54 HDC) sl st to the top of the first st and ch 1.
Round 8:  make 2 HDC in the first st, 1 HDC in the next 8 sts, repeat around (60 HDC) sl st to the top of the first st and ch 1.
Rounds 9-18:  1 HDC in each st around, sl st to the top of the first st and ch 1.  At the end of row 18 begin first ear flap following the above instructions.  Start the second ear flap by counting 24 sts across the front of the hat then attach the yarn and ch 1 follow the instructions above for the second ear flap.

Finishing the bottom of the hat:
Starting at the tip of the ear flap SC evenly around the bottom of the hat using Sapphire Blue, sl st to the top of the first st and make braids using the instructions above.  I do a couple of SC's on the tips of the ear flaps so they lay flat.

Use the pattern above for eyes and horns.


Monday, September 30, 2013

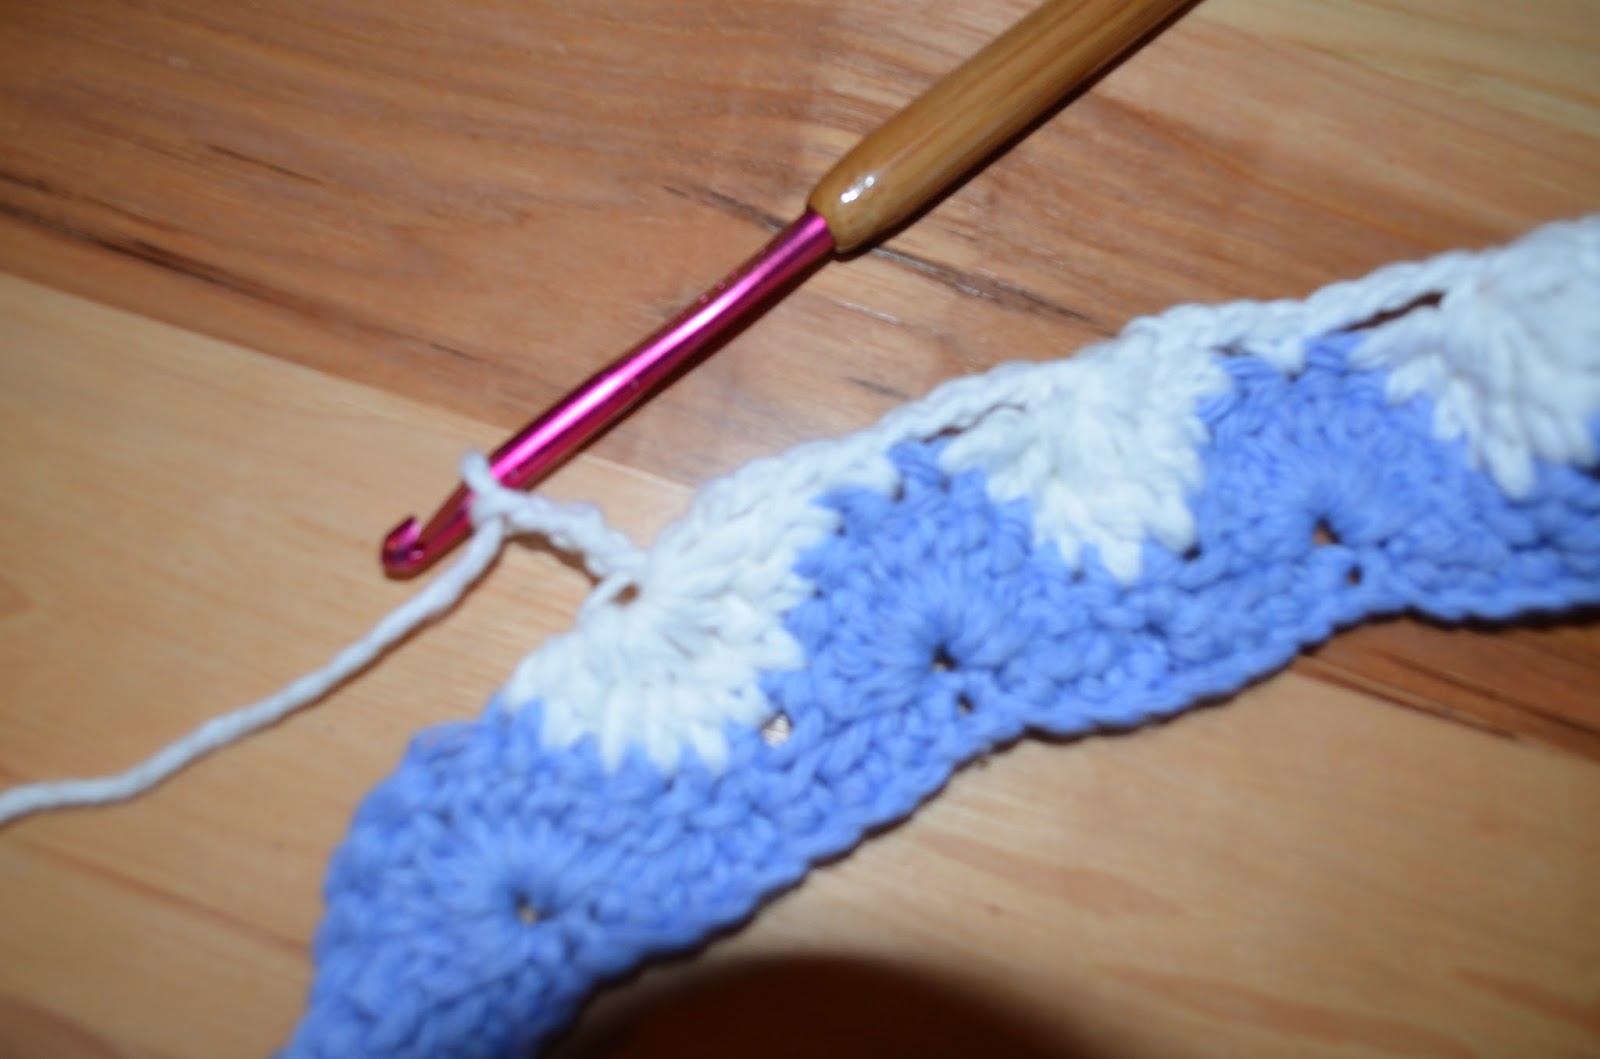
Bushy stitch Dish Cloth

New stitch Monday!!  I have been practicing new stitches again and really like this one because it is such a nice texture and the bonus is that it makes a pretty scalloped edge!!  For this I used Lily Sugar and Cream Ombre in Country Sage but you can make it any color you like.   The bushy stitch is a combination of single and Double crochet stitches that form an asymmetrical shell.  (2 DC, ch 2, 1 SC)

I used a size I hook
yarn needle to weave in the end.

To start you will need to chain 31. (multiples of 3 then add one to make something bigger or smaller).


Row 1:  sk 3 ch, (1 DC, ch 2, 1 SC) in the next ch,  *sk 2 ch, (2 DC, ch 2, 1 SC) in the next ch*, repeat from *, ch 2 and turn.
Row 2:  *(2 DC, ch 2, 1 SC) in each ch 2 space* from the previous row across, ch 2.  Repeat row 2 until your cloth is square, approximately 18 rows.

You can leave the bottom straight or go across it to finish the edge by joining in the bottom right hand corner of the foundation chain and work across in the bottom of each shell, sk the first 2 ch
 *(2 DC, ch2, 1 SC), sk 2 ch* across and tie off at the end.


Friday, September 27, 2013

Hungry Caterpillar Baby Hat

Size 6 to 12 months.
For this hat I used Lion Brand, Vanna's Choice Yarn
in the following colors:
Scarlet
Kelly Green
Radiant Yellow 
Espresso
I also used a size H or 5mm Hook and a yarn needle to sew on the parts. 

The base of the hat is worked in Double Crochet (DC) and the bottom is worked in a front post stitch where you alternate with one Single Crochet in the first stitch then one DC in the post of the stitch above your next stitch.  This gives it a little nicer finish at the bottom.  

Working in Scarlet:
You can either start with a magic loop, or chain 4 and make a loop, then chain 2.
Round 1:  make 10 DC in the loop, sl st to the top of the first st, and ch 2.
Round 2:  do 2 DC in each st around, sl st to the top of the first st, ch 2. (20 DC)
Round 3:  *2 DC in the first st, 1 DC in the next st*, repeat around, sl st to the top of the first st, ch 2. (30 DC)
Round 4:  *2 DC in the first st, 1 DC in the next 2 sts*, repeat around, sl st to the top of the first st, ch 2.  (40 DC)
Round 5:  *2 DC in the first st, 1 DC in the next 3 sts*, repeat around, sl st to the top of the first st, ch 2. (50 DC)
Round 6:  1 DC in each st around, sl st to the top of the first st, ch 2. (50 DC)
Round 7:  *2 DC in the first st, 1 DC in the next 9 sts*, repeat around, sl st to the top of the first st, ch 2. (55 DC)
Rounds 8-12:  1 DC in each st around, sl st to the top of the first st, ch 2.  After round 12 ch 1.  
Rounds 13-14:  *1 SC in the first st, do a DC post st in the stitch above the next st*, repeat around, and sl st to the top of the first SC, ch 1.  (28 post stitches).

Eyes:  working in Kelly Green, make a loop, ch 2.
Round 1:  do 3 DC, 2 TC, 3 DC, 3 TC in the loop, sl st to the top of the first DC, tie off and switch to yellow, ch 1.
Round 2:  2 HDC in each st around, tie off leaving enough yarn to sew the eye on.  

Antennae:  Working in Espresso make a loop and ch 2. (Make 2)
Round 1:  6 DC, sl st to the top of the first st, ch 1.
Round 2 & 3:  1 HDC in each st around, sl st to the top of the first st, ch 1.
Round 4:  1 HDCD in the first two sts, 1 HDC in the next 4 sts, sl st to the top of the first st., ch 1.
Rounds 5-7:  1 HDC in each st around, sl st to the top of the first st, ch 1.  At the end of round 7 tie off leaving enough yarn to sew on. 

Nose:  Working in Kelly Green make a loop and ch 1.
Round 1:  do 6 HDC, 4 SC in the loop, sl st to the top of the first st and tie off leaving enough tail to sew on the nose.

Monday, September 23, 2013

Patriotic Starburst Dishcloth

This is another new stitch for me, actually I tried to make a dishcloth from a book I purchased and could not get it to work, so I had my sister try it, then my niece tried as well and we all failed.  After looking at the Reader's Digest Complete Guide to Needlework we got it figured out.  Turns out the pattern in the book was missing a couple of key steps to finish the starburst.  After a trial I decided it also needed a base chain that is first chain stitches, then one row of single crochet to keep the bottom neat.  This pattern also requires DC decrease stitches worked in multiple stitches and I will try to give a good description of that so it makes it easier.  In this dish cloth I used the following:
Size I or 5.5 mm hook
yarn needle
Lily Sugar 'n Cream cotton yarn in Cornflower, Red and White.

The starburst stitch is worked in multiples of 8 plus 2 in the base chain, so for a dishcloth I used 34 for my base chain starting with the Cornflower chain 34.
Row 1:  ch 1 then do 1 SC in each stitch in your chain, turn.
Row 2:  ch 1, sk the first st, SC in the next st, *sk 3 sts, 9 DC in the next st, sk 3 sts, 1 SC in the next st*, repeat across, ending with a SC in the last st.  Tie off and change to White turn.
Row 3:  ch 3 sk the first SC, 4 DCD in the next 4 sts. (*yo, insert hook in next st, pull up a loop, yo pull through first two loops*,  repeat in the next three sts, yo pull through all 5 loops on the hook, ch 4), SC in the next st, ch 3 start next starburst by doing [9 DCD in the next 9 sts.  *yo, insert hook in next st, pull up a loop, yo pull through two loops on the hook* repeat in the next 8 sts, yo pull through all 10 loops on the hook, ch 4, sc in the next st, ch 3], start the next starburst.  After making the third starburst end the row with 5 DCD in the last 5 sts, (yo, insert hook in next st, pull up a loop, yo pull through the first two loops* repeat in next 4 sts, yo pull through all 6 loops on the hook, ch 3 turn.
Row 4:  4 DC in the top of the starburst, 1 SC in the SC, *9 DC in the center of the next starburst, 1 SC in the next SC* repeat in the next 2 starbursts, 5 DC in the top of the last starburst, tie off, switch to red ch 3 turn.
Row 5:  sk the first st, *9 DCD in the next 9 sts, ch 4, sc in the next st, ch 3*, repeat across and end with a SC in the turning ch, ch 1, turn.
Row 6:  SC in the SC *9 DC in the top of the starburst, 1 SC in the next SC* repeat across ending with 1 SC in the turning ch, tie off and switch to white, ch 3.
Row 7 to Row 17:  repeat intructions from Row 3-6 changing colors every two rows.
Row 18:  SC evenly across the top securing the ch 3 stitches to the DC below in the starbursts to elimanate gaps.  Tie off and weave in all ends.

Making the Starburst stitch.


Saturday, September 21, 2013

Minion In Overalls Hat

If you search Ravelry, I'm sure you'll find some cute minion hats - they are out there - but they are all missing one key feature - the overalls! You can't make a minion without the overalls. It's like s'more without the chocolate.
Here is the minion with his pants on:

Materials:
Cascade Superwash 220 in Colonial Blue Heather (904), Lemon (820), and scraps in black, white, navy, and grey.
Size 7 circular needles (I used a 16")
Stitch Marker

Pattern:
Cast on 88 stitches in Colonial Blue. Place maker (important), join and work in a knit 2, purl 2 rib for 10 rows.
Work next row in all knit stitches in Colonial Blue.

For the next few rows you will be carrying colors not in use on the inside of the work. It is very important to make sure that you leave enough yarn inside the work for the piece to stretch. This is a rather difficult balance to master so that the yarn inside isn't too loose or too tight - it may take a couple attempts if you have not knitted with multiple strands at the same time.

Overalls:
Rows 1-3: Knit 10 in Lemon, Knit 4 in Blue, Knit 16 in Lemon, Knit 4 in Blue, Knit 20 in Lemon, Knit 4 in Blue, Knit 16 in Lemon, Knit 4 in Blue, Knit 10 in Lemon.
Row 4: Knit 10 in Lemon, Knit 10 in Blue, Knit 4 in Lemon, Knit 10 in Blue, Knit 20 in Lemon, Knit 10 in Blue, Knit 4 in Lemon, Knit 10 in Blue, Knit 10 in Lemon
Rows 5-6: Knit 10 in Lemon, Knit 24 in Blue, Knit 20 in Lemon, Knit 24 in Blue, Knit 10 in Lemon
Row 7: Knit 20 in Lemon, Knit 4 Blue, Knit 40 in Lemon, Knit 4 Blue, Knit 20 in Lemon
Rows 9-10: Knit in Lemon
Row 11: Knit 37 in Lemon, Knit 1 in Black, Knit 12 in Lemon, Knit 1 in Black, Knit 37 in Lemon
Row 12: Knit 37 in Lemon, Knit 14 in Black, Knit 37 in Lemon
Row 13: Knit 37 in Lemon, Knit 1 in Black, Knit 12 in Lemon, Knit 1 in Black, Knit 37 in Lemon
Rows 14-26: Knit in Lemon
Rows 27-29: Knit in Black
Rows 29+: Knit in Lemon to desired length for size - I knitted 15 rows for a large adult hat

Decrease:
DRow 1: Knit 9, K2tog. Repeat
DRow 2: Knit
DRow 3: Knit 8, K2tog. Repeat
DRow 4: Knit
DRow 5: Knit 7, K2tog. Repeat
DRow 6: Knit
DRow 7: Knit 6, K2tog. Repeat
DRow 8: Knit
DRow 9: Knit 5, K2tog. Repeat
DRow 10: Knit
DRow 11: Knit 4, K2tog. Repeat
DRow 12: Knit
DRow 13: Knit 3, K2tog. Repeat
DRow 14: Knit
DRow 15: Knit 2, K2tog. Repeat
DRow 16: Knit
DRow 17: Knit 1, K2tog. Repeat
DRow 18: K2tog. Repeat
Sew up remaining stitches and firmly attach. Weave in all loose ends (will be quiet a few).

To make one eye:
With navy yarn and size f crochet hook, chain four and join. Chain 2 then double crochet into loop 15 times and slip last stitch to first chain. Switch to white yarn and double crochet into each stitch on the previous round twice. Work two rounds in White, then switch to grey yarn and work around eye again in grey. Sew eye onto hat so that it is centered about mouth and on the black band.

Monday, September 16, 2013

Wagon Wheel Sunflower Dish Cloth

Here is another sampler pattern from the old Reader's Digest Book my sister gave me, this one is the wagon wheel which in itself is beautiful, and you can get very colorful with the circles using lots of scraps.
I decided to turn the wagon wheel into a sunflower since there are so many beautiful ones growing in area gardens.  This pattern is easy and can be made larger by repeating rows 3 and 4 until you get the desired size.  For this I used Sugar 'n Cream Yarn in the following colors:
Warm Brown
Sage Green
Yellow
I think it would also look nice with the Wine color in place of the green.
I used an I or 5.5mm hook
yarn needle to weave in ends

To start the wagon wheel working in brown you chain 4 and make a loop.
Round one:  ch 3 and do a petal stitch in the ring [(yo, insert hook, draw up a loop)2 times, yo, draw through all 5 loops, ch 1], make 7 more petal stitches in the ring, sl st to the top of the beginning chain, then sl st to the first ch 1 space.
Round two:  ch 2, 1 DC in the same ch 1 space, ch 2. (2 DC ch 2) in each of the next 7 ch 1 spaces, sl st to the top of the beginning chain, then sl st to the first ch 2 space.
Round three:  ch 2, (1DC, ch 1, 2 DC, ch 1) in the first space, (2 DC, ch 1, 2 DC, ch 1) in each of the next 7 ch spaces, sl st to the top of the beginning ch 2 and sl st to the first ch 1 space.
Round four:  ch 2, 2 DC in the same ch sp, ch 1, (3 DC ch 1) in each of the next 1 ch spaces, sl st in the top of the beginning ch 2 and tie off.
Round five:  join with Sage Green, ch 1 then do 1 SC in each st around and 1 SC in each sp, then sl st to the top of the first ch and tie off.
Round six: join with yellow above any of the ch 1 spaces from round 4 and ch 1, sk the next st, and in the next stitch (which is above the middle st from the 3 DC cluster in round 4) do *1 HDC, 1 DC, 3TC, 1DC, 1HDC, sk the next st, SC in the next st, and repeat around for a total of 16 petals, sl st to the top of the first ch.
Round seven:  *1 sc in the next three sts, in the next st which is the top of the petal do 1 SC, ch 3, 1 SC, then 1 SC in the next 3 sts, sl st in the next st and repeat around each petal.  End with a sl st at the bottom and tie off and weave in the ends.

Thursday, September 12, 2013

Ripple Stitch Dish Cloth

My sister Susan found an old Needlework book that was published by Reader's Digest, in it are a couple of pages of different crochet stitches with directions on how to do the stitch.  I have been making dish cloth size samplers and decided to share this one as it is my favorite so far.  The ripple stitch is a small asymmetrical shell stitch and would also make a nice baby blanket or place mat.  For this I used Sugar and Cream cotton in Red and then did another in orange, pink and varigated, I loved them all!!

Here is what you need to get started:
Lily Sugar 'n Cream cotton in your favorite color
Size I crochet hook
needle to hide your ends

This is a slight variation of their pattern as I found a couple of errors in theirs.

To start this pattern you need a multiple of 3 for your foundation chain.  I used 33.
Chain 33.
Row 1:  Skip the first 2 ch, 2 DC in the next ch, skip the next two ch, *(1 SC, 2DC ) in the next ch, sk 2 ch, repeat this across ending with a SC in the last stitch, then ch 2 and turn.  (10 shells across).

Rows 2-24 areworked in only the SC stitches from the previous row.  
Row 2:  2 DC in the  first SC, sk the next 2 DC stitches and do *(1SC, 2DC) in SC from the previous row, sk the next 2 DC and repeat across.  End the row with 1 SC in the turning ch and ch 2.

I repeated row 2 until my cloth was square or about 24 rows.  Tie off after your last SC and weave in the end.  

Sunday, July 28, 2013

Doc's sparkle hat.

This is for my little Doc McStuffins fan, Emma.  It is toddler size 12-24 months
and a pretty easy project.  It is a little hard to find sparkle yarn, but I used Caron Simply Soft Party in Fuchsia sparkle, and Caron Simply soft Chocolate from my stash. You can find the sparkle yarn at JoAnn Fabrics.

For this yarn I used an I or 5.5 mm hook, and also a yarn needle to sew on the flower.
Start with Chocolate.
To start make a magic loop or a chain 4 loop and chain 2.
Round one:  make 10 DC in the loop, slip stitch to the top of the first stitch and chain 2.
Round two:  make 2 DC in each stitch around, slip stitch to the top of the first stitch, chain 2. (20 DC total)
Round three:  make *2 DC in the first stitch, one DC in the next, repeat around and slip stitch to the top of the first stitch.  Chain 2.  (30 DC)
Round four:  make *2 DC in the first stitch, one DC in the next 4 stitches, repeat around and slip stitch to the top of the first stitch, chain 2.  (36 DC)
Round five:  make *2 DC in the first stitch, one DC in the next 5 stitches, repeat around and slip stitch to the top of the first stitch, chain 2.  (42 DC)
Round six:  make *2 DC in the first stitch, one DC in the next 6 stitches, repeat around and slip stitch to the top of the first stitch, chain 2.  (48 DC)
Round seven:  make *2 DC in the first stitch, one DC in the next 7 stitches, repeat around and slip stitch to the top of the first stitch, chain 2.  (54 DC)

Rounds eight-ten:  make 1 DC in each stitch around, slip stitch to the top of the first stitch, chain 2.  (54 DC) after the tenth round slip stitch to the top of the first DC, tie off and change to Fuchsia sparkle and chain 1.

Rounds eleven-14:  make 1 SC in each stitch around, slip stitch to the top of the first SC, chain 1. (54 SC)
At the end of round 14 tie off the Fuchsia and change back to Chocolate and chain 2.

Rounds 15-16:  make 1 DC in each stitch around, slip stitch to the top of the first stitch, chain 2.
Ear Flaps:
After you finish round 16 start on the first ear flap.
Row 1:  1 DC in the next 12 stitches, chain 2 and turn.
Row 2:  skip the first stitch, 1 DC in the next 9 stitches, DCD in the last two stitches, chain 2 turn.
Row 3:  skip the first stitch, 1 DC in the next 7 stitches, DCD in the last two stitches, chain 2 turn.
Row 4:  skip the first stitch, 1 DC in the next 5 stitches, DCD in the last two stitches, chain 2 turn.
Row 5:  skip the first stitch, 1 DC in the next 3 stitches, DCD in the last two stitches, chain 2 turn.
Row 6:  skip the first stitch, 1 DC in the next stitch, DCD in the last two stitches, chain 2 turn.
Row 7:  DCD and tie off.
Count 20 stitches across the front of the hat and begin the second ear flap using the instructions above.

To finish the bottom of the hat starting at the tip of the ear flap SC evenly around the bottom of the hat, 1 SC per stitch in chocolate.

Flower:
Using the Fuchsia Sparkle chain 5 and make a loop.
Round 1:  chain one and make 15 SC in the loop, slip stitch to the top of the first st.
Round 2:  chain 3, skip the first two stitches and slip stitch in the third stitch.  Repeat around making 5 chain 3 loops.
Round 3:  for the Petals 1 SC, chain 2, 4 DC, chain 2, 1SC in each loop around, slip stitch to the bottom of the first chain 3 and tie off leaving enough string to sew on the flower.  You can put a yellow button in the center if desired.

Braids, for each braid I cut 15 32 inch strands and braided using 5 strands in each part of the braid.  Braid, make a knot at the bottom and cut off the ends to make it even.


Friday, July 26, 2013

Zucchini Bread

This is one of my favorite recipes for Zucchini Bread, it is nice and moist and the recipe can be adapted and made as a cake as well.  For a cake I would add cream cheese frosting and make it in a 9 x 11 inch pan.

3 eggs
1 cup oil
2 cups sugar
2 cups grated zucchini
2 teaspoons vanilla
3 cups flour
1 teaspoon salt
1 teaspoon baking soda
1 teaspoon baking powder
3 teaspoons cinnamon
1 cup of raisins or nuts (optional)

For Bread:  Beat the eggs well, add oil, sugar, zucchini, and vanilla.  Add remaining ingredients and mix well.  Bake at 350 degrees for 1 hour.  Makes 2 loaves.

For Cake:  Use the same ingredients:  however use 2 cups flour instead of 3 cups.  Bake cake accordingly in a 9 x 11 inch pan.

Thursday, July 18, 2013

Chocolate Zucchini Cake

This is an old family favorite, and not only does it look beautiful when it comes out of the pan, but it is amazing.  The original recipe calls for 2 tsp. grated orange peel, I never do that, but I do add extra vitamin C in the form of CHOCOLATE.  You will need a 10 inch bundt pan, I love my nordic ware one.

2 1/2 cups all purpose flour
1/2 cup cocoa
2 1/2 teaspoons baking powder
1 1/2 teaspoons baking soda
1 teaspoon salt
1 teaspoon cinnamon
3/4 cup soft butter
2 cups sugar
3 eggs
2 teaspoons vanilla
2 cups grated zucchini
1/2 cup milk
1 cup of nuts if desired
1 cup chocolate chips

Combine flour, cocoa, baking powder, baking soda, salt and cinnamon and set aside.  With your mixer beat together butter and sugar until smooth.  Add eggs, 1 at a time, beating well after each.  Add vanilla, fold in flour mixture alternately with milk and zucchini.  Pour into a greased and floured bundt pan and bake at 350 degrees for 1 hour.

Monday, June 17, 2013

Red, White, & Blue Baby Boy

So you can probably tell that life for this great big family has been busy! We had the last of mom's six (yes I said six) children graduate high school a couple weeks ago, so lots of valuable knitting time was spent in planning, preparing, and traveling for the big event. But, on the 6 hour car ride from here to the family farm I stitched up this little hat for a new baby at church. What makes a better gift for a July 3rd baby shower than a July 4th inspired hat (that hopefully won't be needed until about November).

Here's the pattern:

Materials:

  • Size 7 Circular Needle 16 inches
  • Lion Brand Wool-Ease yarn in Navy, Ranch Red, and White Frost
  • Stitch Marker
  • Yarn Needle
Cast on 80 stitches in Navy. Knit in K2,P2 rib for 1 inch. Knit 2 rows in stockinette stitch. Begin pattern.

Row 1: Switch to Red, *Knit 3, Slip 1 with yarn in back* Repeat.
Row 2: *Purl 3, Slip 1 with yarn in back* Repeat.
Rows 3&4: Switch to Navy and knit entire row.
Row 5: Switch to White, Knit 1, *Slip 1 with yarn in back, knit 3* Repeat to last 3 stitches, Slip 1 with yarn in back, knit 2.
Row 6: purl 1, *Slip 1 with yarn in back, purl 3* Repeat to last 3 stitches, Slip 1 with yarn in back, purl 2.
Rows 7&8: Switch to Navy and knit entire row.

Repeat Rows 1 thru 8 three times more, then repeat rows 1 through 4 (you should end two rows after fifth red row). Decrease as follows:

Row 1: Knit 8, Knit 2 together, repeat.
Row 2: Knit 7, Knit 2 together, repeat.
Row 3: Knit 6, Knit 2 together, repeat.
Row 4: Knit 5, Knit 2 together, repeat.
Row 5: Knit 4, Knit 2 together, repeat.
Row 6: Knit 3, Knit 2 together, repeat.
Row 7: Knit 2, Knit 2 together, repeat.
Row 8: Knit 1, Knit 2 together, repeat.
Row 9: Knit 2 together, repeat.

Sew up remaining 8 stitches and tie in all ends.

Thursday, May 16, 2013

Rhubarb Coffee Cake

This is an old recipe from a cookbook that Lucy Boykin, a former kindergarten teacher that lived near my parents growing up compiled to raise money for scholarships, she was a sweet lady and loved by all.  Rhubarb is one of my springtime favorites and this recipe is so good that even people who think they hate rhubarb like it.

1 1/2 cups brown sugar
1/4 cup white sugar
1/2 cup shortening (I use butter)
Cream together
Add:
1 egg
2 cups flour
1 tsp baking soda
1 cup buttermilk or sour milk
1 1/2 cups cut up raw rhubarb

Add dry ingredients slowly, alternately with milk. Fold in the rhubarb.  Pour into a 9 x 13 greased pan.

Top with 1/3 cup sugar and 1 tsp. cinnamon (mixed).  Bake at 350 degrees for 30-40 minutes.  Serve with whipped cream.

Bee Slouchy

Because of a small incident involving an exploding gallon of paint, I am the proud new owner of a grey winter coat. So here is the hat I created to go with it. I did yellow and grey (to match some gloves I already own), but it would be fun in any color combination!

Materials:

Martha Stewart Crafts Extra Soft Wool Blend in grey pearl
Caron Simply Soft in sunshine
Size 7 circular needle 16"
Yarn needle

Pattern:

Cast on 88 stitches in grey pearl. Place marker and join. Knit 6 rows in knit 2, purl 2 rib. Knit 1 row.

Begin repeats:

Row 1: Switch to sunshine yarn. Knit 1 row.
Row 2: Purl.
Row 3: *Purl 2 together, yarn over*, repeat.
Row 4: Purl.
Rows 5-8: Knit.
Row 9: Purl
Row 10: *Purl 2 together, yarn over*, repeat.
Row 11: Purl.
Rows 12-15: Switch to pearl grey and knit.

Repeat Rows 1-15 once more and rows 1-11 again.
Switch to pearl gray and begin decrease

Row 1: *Knit 9, K2tog* repeat.
Row 2: *Knit 8, K2tog* repeat.
Row 3: *Knit 7, K2tog* repeat.
Row 4: *Knit 6, K2tog* repeat.
Row 5: *Knit 5, K2tog* repeat.
Row 6: *Knit 4, K2tog* repeat.
Row 7: *Knit 3, K2tog* repeat.
Row 8: *Knit 2, K2tog* repeat.
Row 9: *Knit, K2tog* repeat.
Row 10: K2tog 8 times. Break yarn and sew remaining stitches together, secure tightly and weave in ends.

To make the hat slouchier, add a row of knit in either the yellow or gray band (or both).

Tuesday, May 7, 2013

Toddler Shark Hat

Sometimes I get an idea for something but then it takes a while to figure out shortcuts and make improvements, this one is one of those hats, I have been working on it and looking at it, and drawing different ideas for an eye that were more like a shark, so finally here it is.  My grandson Liam was official hat tester, and frankly he didn't want to wear a hat for the picture since it was so nice out today, so he opted out of the photo.  For this hat I used Vanna's choice yarn in  the following colors:
Black
White
Silver Grey
Scarlet
I used an I/5.5mm hook
I also used a 7/8" button, but 5/8 would work too.

Starting with Silver Grey make a loop, either  4 chain loop or magic loop, then ch 2.
Round 1:  make 12 DC in the loop and sl st at the top of the first DC, ch 2.
Round 2:  2 DC in each st around and sl st at the top of the first DC, ch 2 (24 DC)
Round 3:  2 DC in the first st, 1 DC in the next, repeat around and sl st at the top of the first DC, ch 2 (36 DC)
Round 4:  2 DC in the first st, 1 DC in the next two sts, repeat around and sl st at the top of the first DC, ch 2 (48 DC)
Round 5:  2 DC in the first st, 1 DC in the next 5 sts, repeat around and sl st at the top of the first DC, ch 2 (56 DC)
Rounds 6-12:  1 DC in each st around, sl st at the top of the first DC, ch 2 (56 DC)
Start on the chin strap at the end of round 12.
Chin Strap:
Row 1:  1 DC in the next 8 sts, ch 2 and turn.
Row 2:  1 DC in the next 6 sts, DCD in the last two sts. ch 2 turn.
Row 3:  1 DC in the next 7 sts. ch 2 turn.
Row 4:  1 DC in the next 5 sts. DCD in the last 2 sts., ch 2 turn.
Rows 5 & 6:  1 DC in the next 6 sts. ch 2 turn.
Row 7:  sk the first st 1 DC in the next 4 sts. ch 2 turn.
Row 8:  1 DC in the next 5 sts., ch 2 turn.
Row 9:  sk the first st 1 DC in the next 4 sts. ch 2 turn.
Row 10:  1 DC in the next 4 sts. ch 1 turn
Row 11:  1 SC in the 1st st. ch 2 sk the next 2 sts 1 sc in the last st. ch 1 turn.
Row 12:  1 SC in the 1st st. 2 SC in the ch 2 space, 1 SC in the last st.  Tie off string and weave in the end.

For the chin strap on the other side join leaving 18 stitches across the back of the hat, and 24 across the front of the hat, repeat rows 1 through 7 and tie off and weave in the end, sew the button on between rows 5 and 6.
For gums and teeth start at the bottom of the longer chin strap and join with scarlett, SC evenly up the front side of the chin strap and then 1 SC in each st across the front of the hat and down the short side of the chin strap.  For teeth again starting at the bottom of the longest chin strap count your scarlett stitches to see how many you have, (I had 22) for each tooth you need 3 stitches and you will use a few SC at the bottom to make it so your last tooth ends where the chin strap joins the front of the hat. (see photo)  I had 2 SC then 6 teeth up the front side of the chin strap.  A tooth is made by making a sl st in the first st, *chain 3 then make 2 DC in the same st., sk the next st and sl st in the next st, repeat from *.  You should end up with 8 teeth across the front and 4 down the button side.  If you need you can leave a few SC in the corners of the mouth of the shark or at the bottoms of the chin strap.

Fin, make a magic loop and ch 2.
Round 1:  6 DC in the loop and pull it tight, sl st to the top of the 1st DC ch 2.
Round 2:  2 DC in the first st, 1 DC in the next st repeat around, sl st to the top of the first DC, ch 2.
Round 3:  2 DC in the first st, 1 DC in the next st repeat around, sl st to the top of the first DC, ch 2.
Round 4:  2 DC in the first st, 1 DC in the next st, repeat around, sl st to the top of the first DC, ch 2.
Round 5:  2 DC in the first st 1 DC in the next 2 sts., repeat around, sl st to the top of the first DC, ch 2.
Round 6:  1 DC in the next 4 sts, 1 SC in the next 6 sts, 1 DC in the next 8 sts, 1 SC in the next 6 sts, 1 DC in the last 4 sts, tie off leaving enough yarn to sew fin to the top of the hat.  

Eyes:
start with black and make a magic loop.  Make 8 SC in the loop and pull it tight, sl st to the top of the first SC and tie off.
Round 1:  Join with white and chain 1, in the same st make 2 SC, and then make 2 SC in the next 3 sts., tie off  leaving a long string to sew the white part of the eye to the hat and make a fleck in the black part of the eye (see photo).  Join on the silver grey, ch 1 and make 2 HDC in the same st then 2 HDC in the next 3 sts, ch 1  turn and make a second row of grey with 1 HDC in the top of each st, tie off leaving enough string to sew the grey half of the eye on the hat.  To finish the eye with your needle and a double strand of black string make a line at the bottom of the grey to the pupil with two stitches.


Tuesday, April 23, 2013

Cotton Flower Beanie

Cotton Flower Beanie

This hat is a variation of the Spring Flowers hat and is so cute on.  For this hat I used Universal Yarn Cotton Supreme Batik in Watermelon Patch.  It is a super soft yarn that is self striping.   You will also need a size J hook and a 7/8 or 1 inch button.  

This hat is toddler size, 18-24 months. 

 Start with a magic loop or a chain 4 loop which ever you prefer.
Round 1:  Ch 1 and make 10 HDC, sl st to the top of the first HDC.
Round 2:  Ch 1 and do 2 HDC in each st around, sl st to the top of the first HDC.  (20 HDC)
Round 3:  Ch 1 and do *2 HDC in the first st and 1 HDC in the next st, repeat around, sl st to the top of the first HDC.  (30 HDC)
Round 4:  Ch 1 and do *2 HDC in the first st and 1 HDC in the next 4 stitches, repeat around, sl st to the top of the first HDC.  (36 HDC)
Round 5:  Ch 1 and do *2 HDC in the first st and 1 HDC in the next 5 stitches, repeat around, sl st to the top of the first HDC, join to the top of the first HDC.  (42 HDC)
Round 6:  Ch 1 and do *2 HDC in the first st and 1 HDC in the next 6 stitches, repeat around, sl st to the top of the first HDC.  (48 HDC)
Round 7 is worked in cluster stitches.  Ch 2 and make beg cl in the first st, (see below for instructions on cluster stitches) *ch 1, sk the next stitch and begin cl in the next st. Repeat from * around, sl st to the top of the first cl.  (24 CL) 

The beginning cluster (beg cl) stitch is made by ch 2, yo, insert hook in the designated st, yo, pull loop through, yo, pull through 2 loops on hook, yo, insert hook in same st, yo, pull loop through, yo, pull through 2 loops on hook, yo, pull through all 3 loops on hook.

Cluster Stitches (cl) are Yo, insert hook in designated st, yo, pull lp through, yo, pull through 2 loops on hook, [yo, insert hook in same st, yo, pull loop through, yo, pull through 2 loops on hook]twice, yo, pull through all 4 loops on hook. 

Rounds 8-12:  sl st to the first ch 1 space and make beg cl (instructions above), *ch 1 make next cl in the next ch 1 space, repeat around, ch 1 sl st at the top of the first cl. (24 cl)

Rounds 13-16:  ch 1 and SC in each st around, sl to to the top of the first SC.  (48 SC) At the end of round 16 tie off and weave in end.  

Flower:  make a magic loop and ch2.  
Round 1:  make 14 DC in the loop and sl st to the top of the first st.
Round 2:  ch 3 sk the first st and join with a sl st to the next st, repeat around for 7 loops.
Round 3:  make the following stitches in each ch 3 space around for petals.  1 SC, 1 HDC, 3 DC, 1 HDC, 1 SC.   Sl st to the first sc and tie off leaving a long enough string to sew on the flower.  Top the flower with a button.  

Monday, April 22, 2013

Tied Up With Love


It was a weekend for using up scrap yarn. I made this with the half skeins left from the Wee Waves Hat and with a little scrap of vintage pink Patons Astra yarn. So, unless you have a stash of vintage yarn like I do, you will probably need to find a suitable replacement for the second contrast color (look for a nice wool blend medium weight 4 ply).

Materials Used:

Main Color: 1/2 skein of Martha Stewart Crafts Extra Soft Wool Blend in Winter Sky
Contrast Colors: 1/5th+ skein (roughly) of Martha Stewart Crafts Extra Soft Wool Blend in Gray Pearl and 1/8th+ skein (roughly) Patons Astra in Deep Pink (or any other 4 ply yarn).
Size 7 circular needles or double pointed needles
Stitch holder

Pattern:
Using Winter Sky yarn, cast on 80 stitches. Join and place marker. Work in knit 1, purl 1 rib for 5 rows.
Knit 3 rows in stockinette stitch.
Continuing in stockinette stitch, work Heart Chart 10 times (for one row of work) using contrast yarn in Gray Pearl
After finishing the 6 rows of the chart, knit 3 rows with main color in stockinette stitch.
Knit the 5 rows LOVE Chart in Deep Pink using stockinette stitch. Repeat Chart 5 times to complete rounds
Knit 3 rows with main color in stockinette stitch.
Repeat Heart Chart over the next 6 rows, repeating chart 10 times for each row.
Knit 3 rows with main color in stockinette stitch.

Decrease:
Row 1: Knit 8,K2tog. Repeat 7 times more.
Row 2: Knit 7, K2tog. Repeat 7 times more.
Row 3: Knit 6, K2tog. Repeat 7 times more.
Row 4: Knit 5, K2tog. Repeat 7 times more.
Row 5: Knit 4, K2tog. Repeat 7 times more.
Row 6: Knit 3, K2tog. Repeat 7 times more.
Row 7: Knit 2, K2tog. Repeat 7 times more.
Row 8: Knit, K2tog.  Repeat 7 times more.
Row 9: K2tog.  Repeat 7 times more.

Slide first 4 stitches onto stitch holder, leaving working yarn at one end of needles. With last four stitches and working yarn from project, knit i-cord for 6 inches. After finishing the cord off and securing end, take stitches from stitch holder and work into a second i-cord for 6 inches. Tie i-cords into bow to top hat.

Thursday, April 18, 2013

Chicken Enchilada Casserole

This recipe is one I got from a friend in Arizona while we lived there on the Hopi Indian Reservation when my husband was serving in the US Public Health Service, Indian Health Service.  We had lots of fun there, with only 3 channels on the TV you got to know your neighbors, and you did things together because your family was so far away.  Every time I make this I think of my friend Joelle and all the fun we had together with our little ones.  I hope that you enjoy this, I haven't found too many people who don't like it, and it is one of our family's all time favorites.

For this you will need:
1 medium onion chopped
1 can chopped green chilis (peppers)
1 can of cream of chicken soup (I use healthy request by Campbells, no MSG and lower salt)
1 can of cream of mushroom soup
1 Cup chicken broth (take the broth from your rotisserie chicken if you use one and if short just add a little water)
1 whole chicken de-boned (rotisserie chickens make the process so easy) Or about 4 chicken breasts.
16 oz. Shredded Cheddar Cheese
10 soft corn tortilla shells quartered

To start make your sauce mix, saute the onion and chopped green chilis in a pan, then add both soups and the cup of broth.

In a 10 x 13 pan spread a little of the sauce mix in the botton and arrange half of your tortilla quarters on top of it, follow with a layer of half the rotisserie chicken, half of the sauce mix and half of the cheese, repeat the layer and bake at 350 for about 30 minutes.  You can add jalepeno peppers if you like more spice, less
onions, or make it with turkey.  It is a great way to use up leftover Thanksgiving turkey.


Tuesday, April 16, 2013

Monster Crochet Hat

Monster Crochet Hat Child size small (6-8)

For this hat I used Vanna's Choice Yarns in the following colors:
Yellow (Duckie)
Lime
Colonial Blue
White
Black
Goldfish
You can change the colors though and use up some of your leftover yarn from other projects.  For the main part of the hat though you will need 1 ball of yarn.
2 7/8 inch black buttons
Pom-pom maker 1 3/8 size
Size I 5.5mm hook

To start make either a magic loop or a chain 4 loop using Yellow.
Round 1:  ch 2 and make 12 DC in the loop, sl st to the top of the first DC and ch 2.
Round 2:  2 DC in each stitch around, sl st to the top of the first DC and ch 2. (24 DC)
Round 3:  2 DC in the first st 1 DC in the next st, repeat around, sl st to the top of the first DC ch 2.  (36 DC)
Round 4:  2 DC in the first st 1 DC in the next two sts, repeat around, sl st to the top of the first DC, ch 2 (48 DC)
Round 5:  1 DC in each st around, sl st to the top of the first DC, ch 2. (48 DC)
Round 6:  2 DC in the first st 1 DC in the next 3 sts, repeat around, join at the top of the first DC, ch 2.  (60 DC)
Rounds 7-16: 1 DC in each st around, sl st to the top of the first DC, ch 2. (60 DC each round) at the end of round 16 begin the first ear flap if you want an ear flap.  This hat can be finished without earflaps by making the 17th round in SC and 1 SC in each st around.

*if you want to make the hat for a smaller child end the main body of the hat at row 14, to make it just a bit smaller in circumference just change Round 6 to 2 DC in the first stitch and 1 DC in the next 5 sts.

Ear flaps are done in HDC: make sure to chain 1 to start Row 1.
Row 1:  1 HDC in the next 12 sts, chain 1 and turn.
Row 2:  sk the first st, 1 HDC in the next 9 sts, HDCD in the last 2 sts, ch 1 and turn.
Row 3:  sk the first st, 1 HDC in the next 7 sts, HDCD in the last 2 sts, ch 1 and turn.
Row 4: sk the first st, 1 HDC in the next 5 sts, HDCD in the last 2 sts, ch 1 and turn.
Row 5: sk the first st, 1 HDC in the next 3 sts, HDCD in the last 2 sts, ch 1 and turn.
Row 6:  sk the first st, 1 HDC in the next st, HDCD in the last 2 sts, ch 1 and turn.
Row 7:  HDCD in the next 2 sts.  Tie off and weave in the end.

Place the other ear flap so there are slightly more stitches across the front of the hat than the back.
and repeat the above instructions for the second ear flap.
Round 17:  To finish the main body of the hat start at the tip of one of the ear flaps and single crochet evenly around putting two stitches at the tips of the ear flap and 1 SC in each st along the bottom of the hat.

Eyes: (make 2)
With white make a magic loop or chain 4 loop and ch 2.
Round 1:  10 DC in the loop, join at the top of the first DC and ch 2.
Round 2:  2 DC in each st around, join at the top of the first DC and tie off leaving enough yarn to sew the eye to the hat.

Nose:  With Goldfish or Orange make a magic chain, it really works best on this since it is small, ch 2 then do 3 DC, 3 SC, 3 DC, 3SC and sl st to the top of the first DC, tie off leaving enough yarn to sew the nose on.

Large Horns: Using Colonial Blue and Lime. (make 2)
Start with the blue and make a magic loop or ch 4 loop and ch 2.
Round 1:  make 6 DC in the loop, sl st to the top of the first DC, ch 2.
Round 2:  2 DC in the first st, 1 DC in the next st  repeat around, sl st to the top of the first DC (9 DC)  Change to Lime and ch 2.
Round 3:  1 DC in each st around, sl st to the top of the first DC, ch 2 (9 DC)
Round 4:  2 DC in the first st, 1 DC in the next st repeat around, sl st to the top of the first DC,  (14 DC) Change to Colonial Blue.
Round 5:  1 DC in each st around, sl st to the top of the first DC, ch 2 (14 DC)
Round 6:  2 DC in the first st, 1 DC in the next st, repeat around, sl st to the top of the first DC and tie off leaving enough yarn to sew the horn on.

Pom Poms are made in Colonial Blue and tie to the end of the Large Horns before you sew them on.

Small Horns:  make 3, 2 in Colonial Blue and 1 in Lime.
Start with a magic loop or a ch 4 loop and ch 2.
Round 1:  make 6 DC in the loop, sl st to the top of the first DC,  ch 2.
Round 2:  2 DC in the first st, 1 DC in the next st repeat around, sl st to the top of the first DC, ch 2 (9 DC)
Round 3:  1 DC in each st around, sl st to the top of the first DC, tie off leaving enough yarn to sew on the horn.

Mouth:  using Black
chain 16
Row 1:  1 DC in the 2 ch from the hook and then 1 DC in the next 3 sts, 1 SC in the next 6 sts, 1 DC in the last 4 sts, ch 2 and turn.
Row 2:  sk the first st, 1 DC in the next 10 sts, DCD in the last 2 sts, ch 2 and turn.
Row 3:  sk the first st, 1 DC in the next 8 sts, DCD in the last 2 sts and tie off leaving enough yarn to sew the mouth on.

Teeth:  using white make 3
Chain 5,
Row 1: 1 DC in the second ch from the hook, and 1 DC in the next 2 sts. ch 2
Row 2:  DCD in the next 2 sts. and tie off leaving enough yarn to sew the teeth to the mouth.

Sew the horns on first then work your way down leaving enough room for the mouth.

Braids are made with 12 strands of yarn for each braid, 32 inches long.

My hat model is also modeling some very cool fake glasses that her Auntie gave her to use for Dress-Up.

You may make and sell products from my patterns, but if you do I ask that you please link back to my original post.  Please do not copy and post this pattern and claim it as your own.  Please do not re-publish photos as your own.  Thanks and I hope you like it!!


Monday, April 15, 2013

Wee Waves Hat

 Supplies:

Size 7 knitting needles - circular 16" and double points (optional - I use the magic loop method with great success at the top)
Martha Stewart Extra Soft Wool Blend by Lion brand - 1 skein winter sky, 1 skein gray pearl
cable needle (helpful, but not absolutely necessary)

Pattern:
With gray pearl, cast on 80 stitches. Place marker and join. Knit in knit 2, purl 2 rib for 1 1/2 inches.

Row 1: Knit
Row 2: Knit
Row 3: Knit
Row 4: knit
Row 5: Switch to winter sky - knit
Row 6: In winter sky: purl 3, *knit 3, purl 7* Repeat from * to * until 7 stitches remain on row. Knit 3, purl 4.
Row 7: Picking up in gray pearl: knit 3, *slip 3 (these will be the knitted stitches from the row before), knit 7* repeat  from * to * until the last 7 stitches, slip 3, knit 4.
Row 8: Repeat Row 7
Row 9: Repeat Row 7
Row 10: Repeat Row 7
Row 11:  In gray pearl: knit 2, place next stitch on cable needle and hold behind (or drop) and knit first slipped stitch, knit stitch on cable needle, knit 2nd slipped stitch, place next slipped stitch on cable needle and hold in front of work, knit 1, knit stitch on cable needle. Knit until next slipped section and repeat. End result should be a fanning effect of the slipped stitches.

Repeat Rows 1-11 twice more.

Begin decrease:
Dec. 1: Knit 8, K2tog, repeat through end of row
Dec. 2: Knit 7, K2tog, repeat through end of row
Dec. 3: Knit 6, K2tog, repeat through end of row
Dec. 4: Knit 5, K2tog, repeat through end of row
Dec. 5: Knit 4, K2tog, repeat through end of row
Dec. 6: Knit 3, K2tog, repeat through end of row
Dec. 7: Knit 2, K2tog, repeat through end of row
Dec. 8: Knit, K2tog, repeat through end of row
Dec. 9: K2tog 8 times.

Break wool and tightly sew top together.

Wednesday, April 10, 2013

Newborn Girl Sweet Alabama Fan hat

This is a hat I made for some friends who are Alabama fans and having a baby girl.  The hardest thing to find is the houndstooth ribbon made popular by coach Bear Bryant.  We finally found some at Hobby Lobby.  This is a simple pattern and could be adapted for a narrower ribbon by changing the 11th row to DC.  For all you Alabama fans out there, Roll Tide!!

For this hat I used a size I/5.5mm hook
Bernat Satin yarn in Flamingo
and 5/8 inch houndstooth ribbon from Hobby Lobby

Round 1:  10 DC in the loop, join together at the top of the first DC and ch 2.
Round 2:  2 DC in each st around (20 DC), join together at the top of the first DC, ch 2.
Round 3:  2 DC in the first st 1 DC in the next, repeat around (30 DC), join together at the top of the first DC, ch 2.
Round 4:  2 DC in the first st 1 DC in the next 4 sts, repeat around (36 DC), join together at the top of the first DC, ch 2.
Round 5:  2 DC in the first st 1 DC in the next 5 sts, repeat around (42 DC), join together at the top of the first DC, ch 2.
Rounds 6-10: 1 DC in each st around (42 DC), join together at the top of the first DC, ch 2.
At the end of round 10 ch 3.
Round 11:  1 TC in each st around (42 TC), join together at the top of the first TC, ch 1.
Round 12: is done in a shell stitch, to start SC in the same st as the ch 1 then sk the next two sts and make 5 DC in the next st, sk the next two sts and SC in the next st.  Repeat the shell (sk the next two sts, 5 DC in the next st, sk the next two sts and SC in the next st) around the base of the hat making 7 shells total, tie off and weave in end.  

Weave the ribbon in the TC row and tie a bow on the side of the hat.  I pulled up two stitches and left 4 behind the ribbon for a pattern.

Abberviations:
DC: Double Crochet
SC: Single Crochet
TC: Triple Crochet
st: stitch
sts: stitches

Tuesday, April 2, 2013

Molly McIntyre Sweater

The American Girl bug is going around our house and our oldest is in love with her doll Molly. Unfortunately, you can't buy an outfit to match the historical dolls. And that is all she really, really wanted for her birthday. So here is my adaptation of the dolls sweater.


Materials:
Size 7 circular needles
Lion Brand Wool-ease worsted weight three skiens Navy, one Ranch Red, one Avacado
yarn needle

I used a basic raglan pattern based on Paton's Classic Wool's Family Raglan Sweatshirt for the sweater. The doll sweater is cut and sewn, but we made the raglan front and adapted the pattern to work. The pattern is written in size 4 with changes for sizes 6, 8, & 10 in parenthesis

Sleeves (make 2):
Using navy yarn, cast on 33 (35, 35, 37) stitches. Work 1 1/2 inches in K2, P2 (first row, K1, *P2, K2* repeat from *) ribbing ending on a reverse side row. Next row knit entire row increasing 4 stitches evenly across. 37 (39, 39, 41) stitches total.

Knit in stocking stitch increasing 1 stitch at each end on the 5th and following 6th (4th, 6th, 4th) rows until there are 53 (47, 45, 67) stitches.
For sizes 6 & 8: increase 1 stitch on each end of the needle on every following 6th row until there are (61, 63) stitches
All sizes: continue in stocking stitch until the sleeve measures 10 1/2 (12 1/2, 14, 15 1/2) inches  ending with a right side row.

Shape Raglan: Cast off 2 stitches at the beginning of the next two rows.
1st row: (K1, P1) twice S1, K1, psso. Knit to the last 6 stitches. K2tog, (P1,K1) twice
2nd row: (P1, K1) twice, P2tog purl to the last 6 stitches, P2tog, (K1, P1) twice
3rd row: Repeat 1st row.
4th row: (P1, K1) twice, purl to last 4 stitches (K1, P1)
Repeat these 4 rows 0 (2, 1, 2) times

Continue to shape raglan as follows:
1st row: (K1, P1) twice S1, K1, psso. Knit to the last 6 stitches. K2tog, (P1,K1) twice
2nd row: (P1, K1) twice, purl to last 4 stitches (K1, P1)
Repeat these rows until there are 7 (7, 9, 9) stitches remaining. Place remaining stitches on a stitch holder and set aside.
Back:

With navy yarn, cast on 72 (78, 84, 88) stitches. Work in K2, P2 ribbing for 1 1/2 inches ending in a reverse side row. Work in stocking stitch for 8 1/2 (9 1/4, 10 1/2, 11 1/2) inches ending with a right side facing for the next row.

Shape raglan:
Cast off 2 stitches at the beginning of the next 2 rows.
1st row: (K1, P1) twice S1, K1, psso. Knit to the last 6 stitches. K2tog, (P1,K1) twice
2nd row: (P1, K1) twice, P2tog purl to the last 6 stitches, P2tog, (K1, P1) twice
3rd row: Repeat 1st row.
4th row: (P1, K1) twice, purl to last 4 stitches (K1, P1)
Repeat these 4 rows 0 (0, 1, 1) times
Continue to shape raglan as follows:
 1st row: (K1, P1) twice S1, K1, psso. Knit to the last 6 stitches. K2tog, (P1,K1) twice
2nd row: (P1, K1) twice, purl to last 4 stitches (K1, P1)
Repeat these rows until there are 26 (28, 30, 32) stitches remaining. Place remaining stitches on a stitch holder and set aside.

Front (this panel with be significantly less stretchy, so it is knit with extra stitches):

Using navy yarn, cast on 82 (88, 94, 98) stitches. Work in K2, P2 rib for 1 1/2 inches, ending with a wrong side row.

Using the following chart, work pattern across stitches (don't worry if you end mid-pattern). Work pattern in stocking stitch (Knit across front, purl across back) for 8 1/2 (9 1/4, 10 1/2, 11 1/2) inches ending with a right side facing for the next row.

Shape raglan (still using chart):
Cast off 2 stitches at the beginning of the next 2 rows.
1st row: (K1, P1) twice S1, K1, psso. Knit to the last 6 stitches. K2tog, (P1,K1) twice
2nd row: (P1, K1) twice, P2tog purl to the last 6 stitches, P2tog, (K1, P1) twice
3rd row: Repeat 1st row.
4th row: (P1, K1) twice, purl to last 4 stitches (K1, P1)
Repeat these 4 rows 0 (0, 1, 1) times
Continue to shape raglan (still working pattern) as follows:
 1st row: (K1, P1) twice S1, K1, psso. Knit to the last 6 stitches. K2tog, (P1,K1) twice
2nd row: (P1, K1) twice, purl to last 4 stitches (K1, P1)
Repeat these rows until there are 36 (38, 40, 42) stitches remaining. Place remaining stitches on a stitch holder and set aside.

Place the pieces on the circular needle as follows with right sides facing: sleeve, front, sleeve, back. Starting with sleeve/back seam, begin working stitches in a K2, P2 rib. Work 1 inch and cast off loosely. Turn inside out, sew all seams together and work in ends.